If you are collecting 360º imagery, you may have noticed a distinct lack of viable camera mounting options when on foot. Over the years I have seen a variety of options, including helmet mounts, handheld monopods, third-person harnesses, and backpack mounts. Many of the currently available options have their flaws. Helmet mounts require constant awareness of your head position and may interfere with the integrity of safety devices. Handheld monopods are a great solution for small, rapid collection scenarios, but will get tiresome in a hurry. Third-person harnesses are designed to capture you during your activity and lack the features typically required for capturing quality imagery of a site. Most currently available backpacks mounts are either flimsy (little more than a basic backpack with a monopod attachment), expensive, or both. Oddly enough, it seems that there used to be some good backpack options available, but many of them are no longer available, likely due to lack of sales.


So, where does that leave us? In all likelihood, that means assembling our own rig. Before we get started, let’s consider what we need in a good 360º camera rig:

  • Stability: Whether you’re collecting still images or videos, it’s critical to ensure that your captures are stable and consistent. An unstable rig can cause additional post-processing at best and ruin a project at worst.
  • Comfort: Field data collection is enough of a challenge. We don’t need our gear to make things worse.
  • Portability: Not everyone will be driving to a job site in a large work truck or van. A rig needs to be portable enough to throw in the trunk or backseat of a compact car, even if it’s already crammed with stuff.
  • Adjustability: Sometimes your camera needs to be low and compact to clear tree branches and other obstructions while walking on a rugged terrain. Other times you may want to have your camera extended to capture a wider view of the surroundings or assets at height. One rig that can support a wide range of situations is ideal.
  • Clean, Professional Appearance: Just because you can fix up a rig with duct tape and some pallet wood, doesn’t mean you should. Any time you’re out in the field, you’re representing your company, so you want to make sure you look professional, even if you’re trudging through the mud. Even if there’s nobody around to see you, we are collecting 360º imagery here. Unless you plan on post-processing to remove the data collector from all of your photos, your customer is going to see your rig.

The Rig: What You'll Need

Everything we need to assemble our rig.

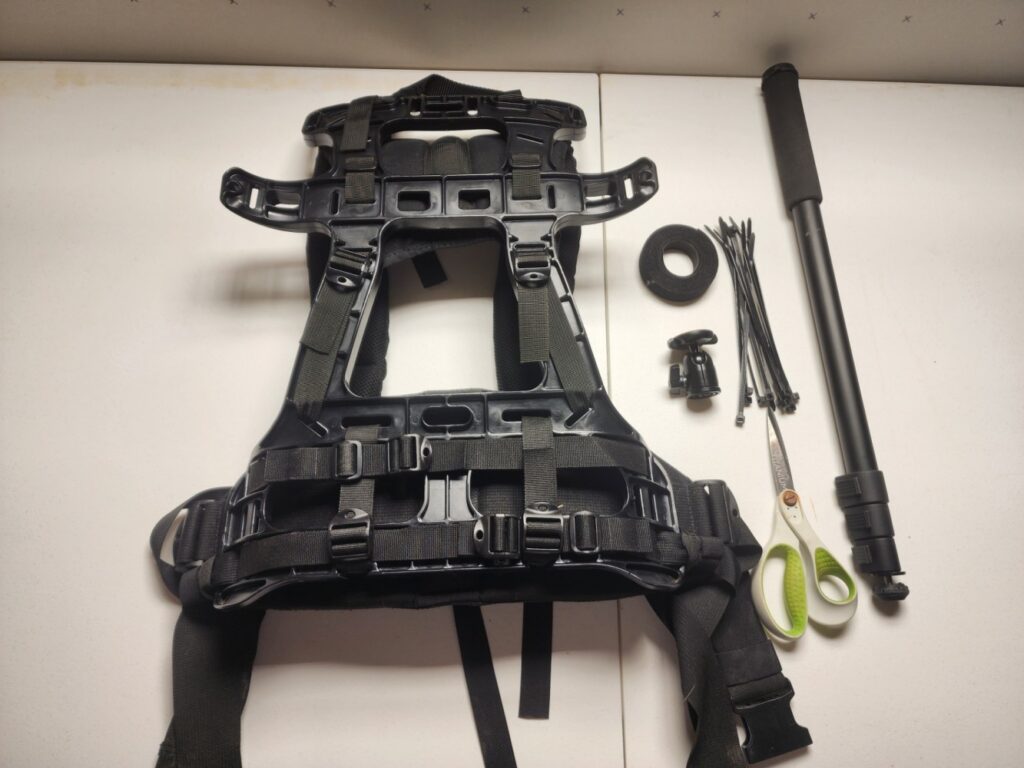
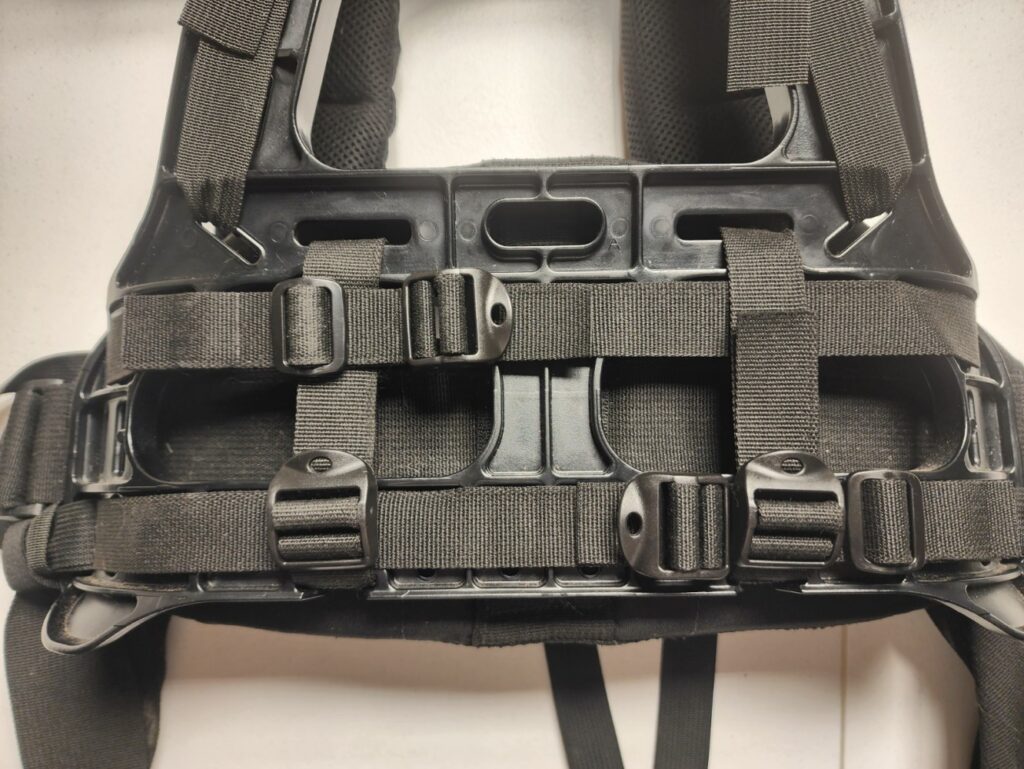
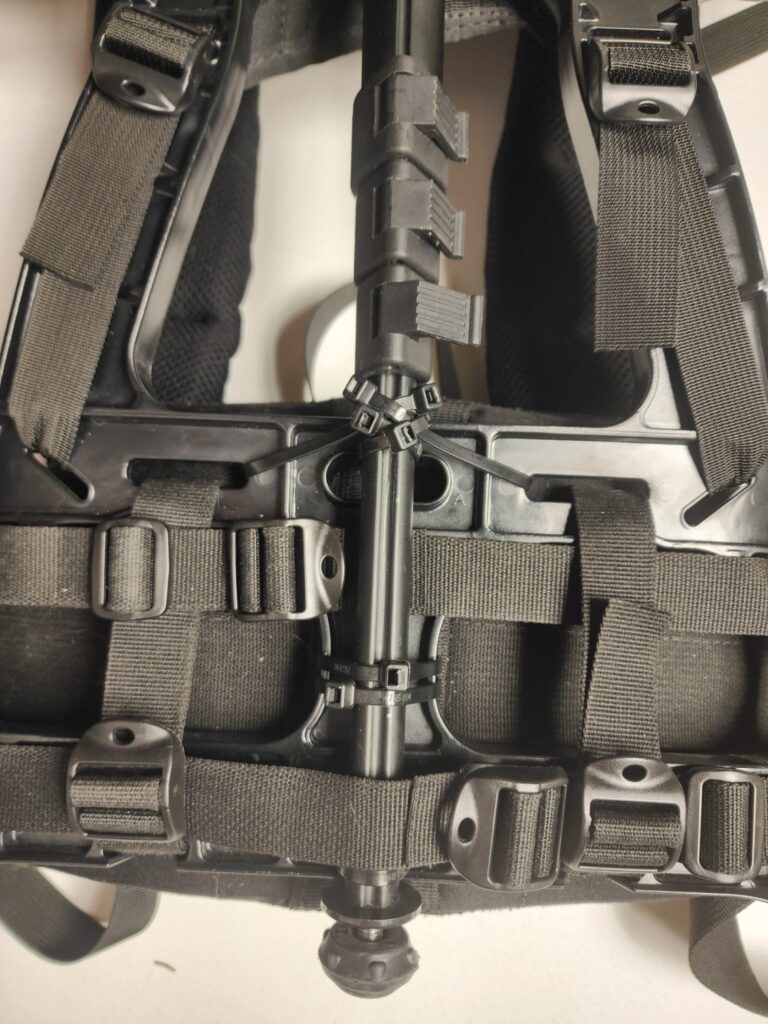
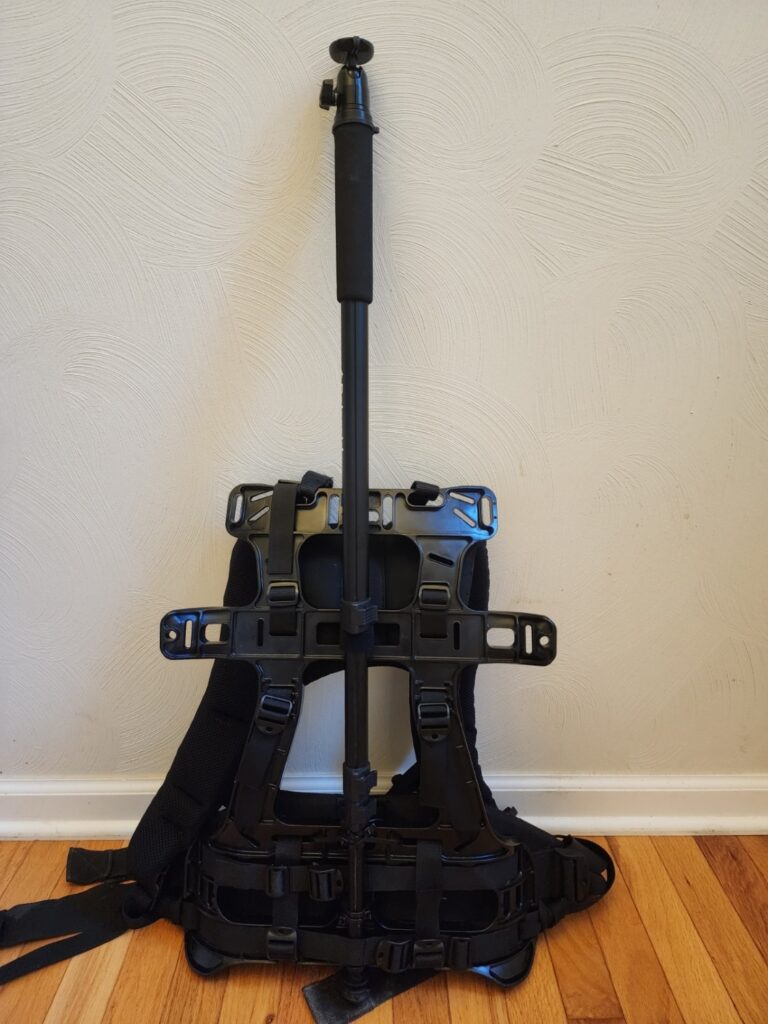
Backpack Frame and Straps Set

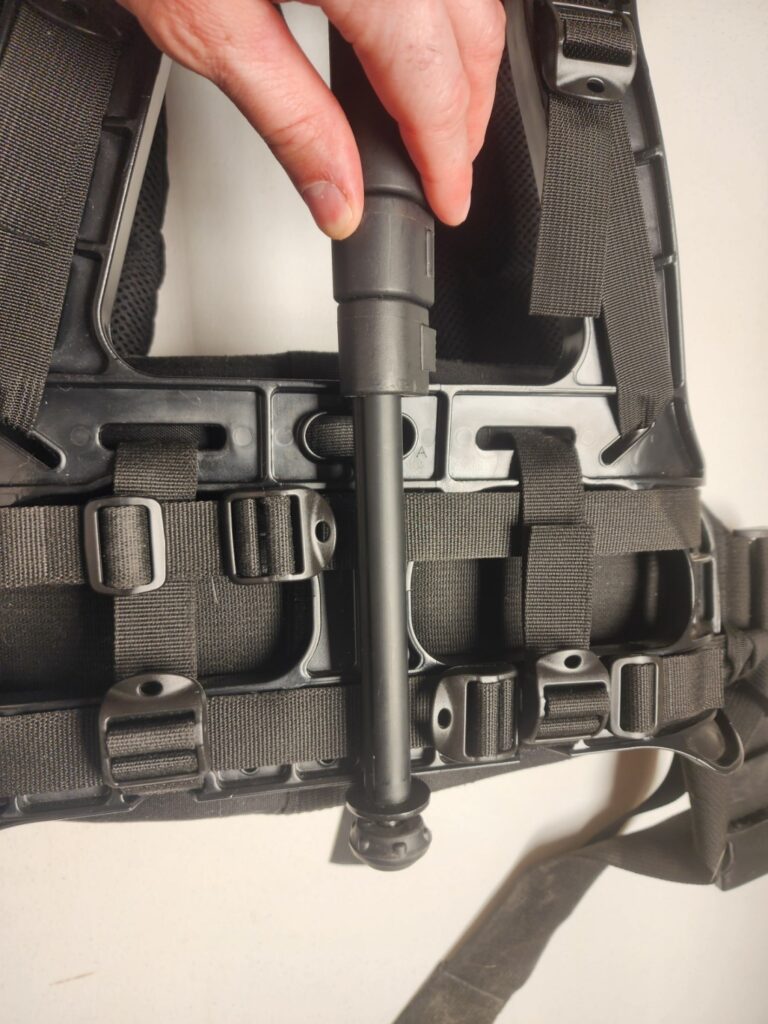
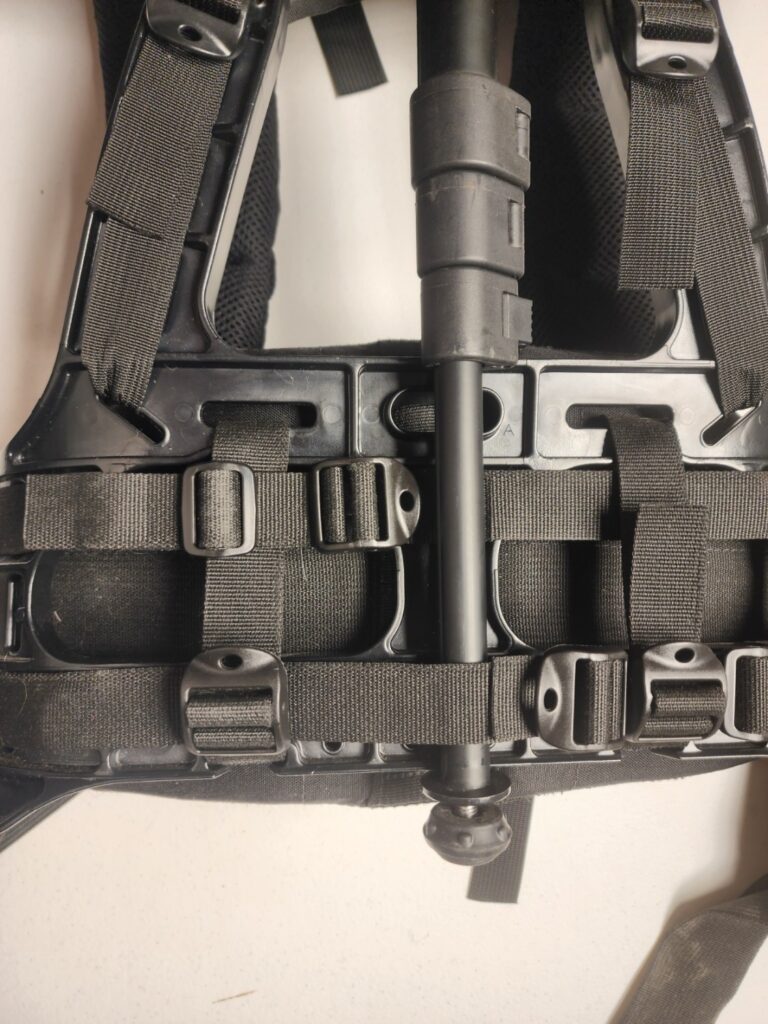
For our purposes, we need something lightweight, stable, and comfortable that will serve as a sturdy mount for our monopole. Ideally, we want something that will permit mounting the monopole in the center of the pack for maximum comfort and picture quality.

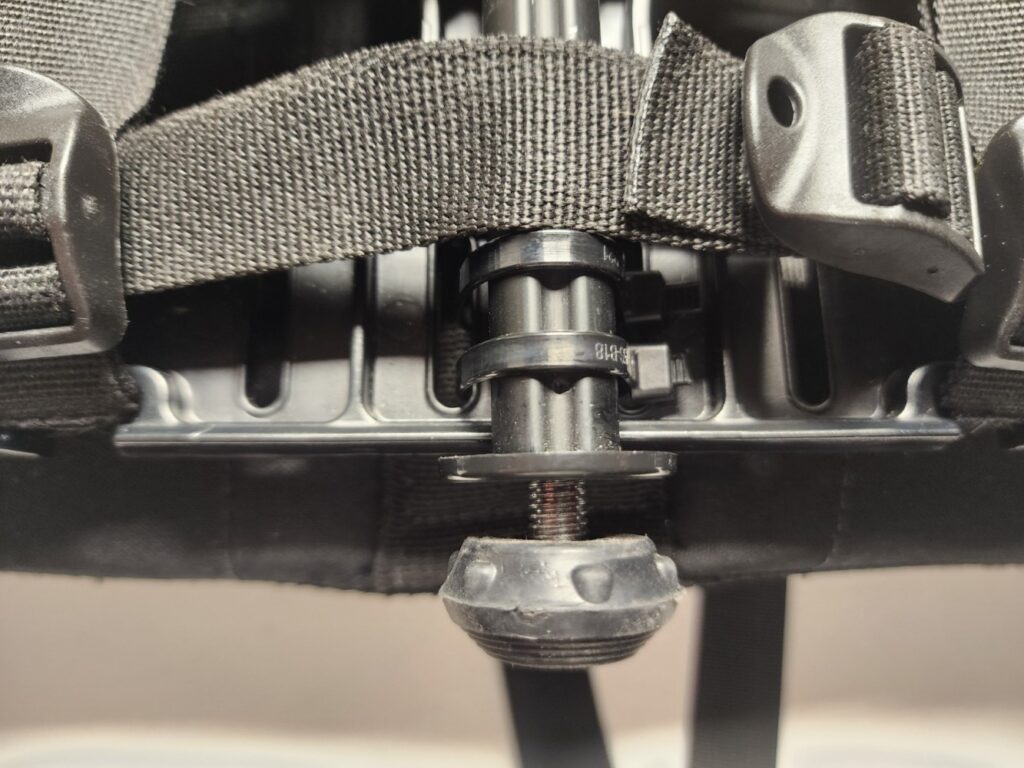
For my rig, I’m using the Mountaineering-Style Pad Set from Down East Innovation. It’s based on the 1606AC frame commonly used by the military. At just $125, it’s well worth the price.


Monopod

We need something sturdier than a selfie-stick, but there’s no need to break the bank here. There are a variety of options in the $20 range, including Amazon Basics and Altura. There are options as long as 72″, but that’s likely to be far taller than we can wear safely. Don’t worry too much about features, since it’s likely going to remain attached to your backpack. Find something with good reviews that will attach to a backpack with ease and go for it.


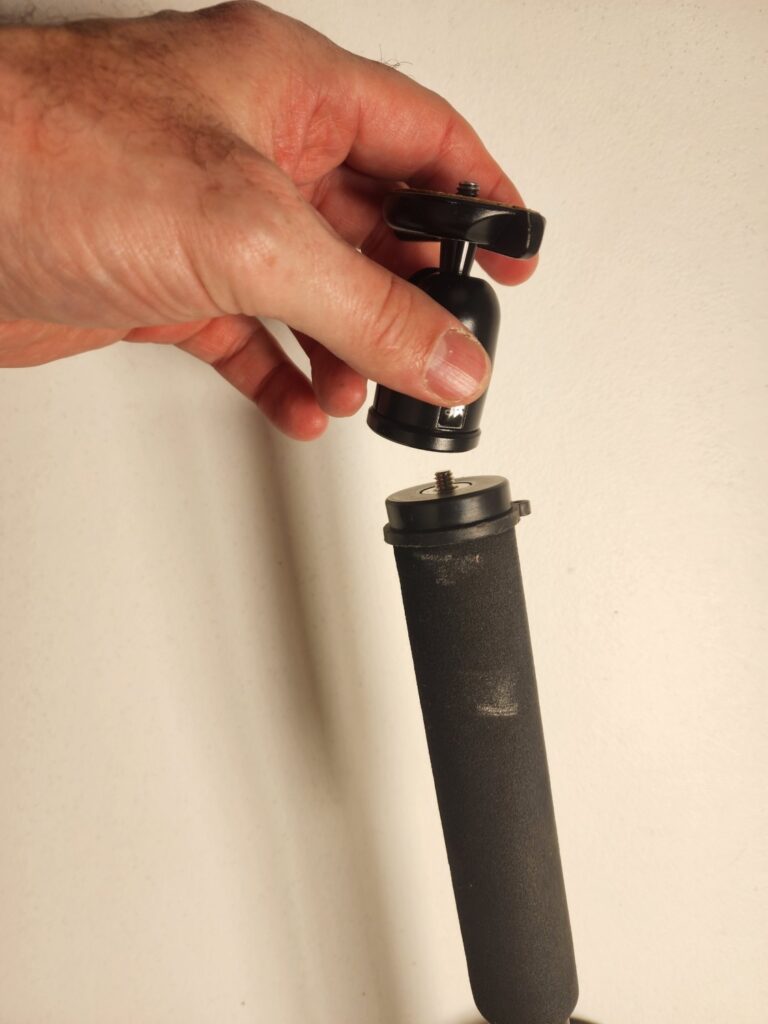
Adjustable Ball Head

Unless you walk and run like Forest Gump or the T1000 from T2, you’re going to want a ball mount to keep your camera as straight and level as possible during data collection. A ball mount will provide maximum flexibility to align and rotate your camera. This is another case where simple, sturdy, and reliable is ideal. There are options from UTEBITSIOTI, and others that will be more than sufficient for our needs.


Zip Ties

Sure, there are other ways that we can attach the pole, but zip ties just work. They are strong, sturdy, and do a great job of holding the monopod and camera in place. If done right, they will also leave a very professional appearance, especially when color-matched to the backpack. Heavy-duty 8″ black zip ties are ideal for our purposes.


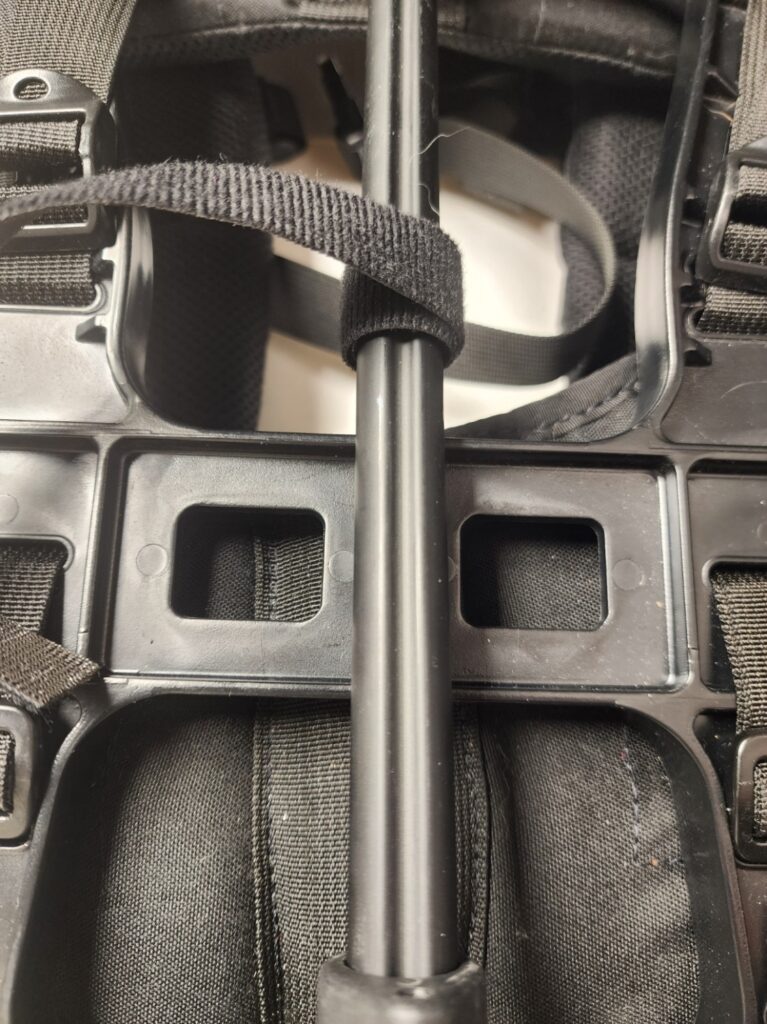
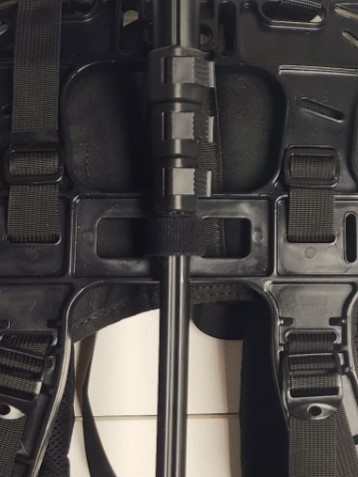
Velcro Straps (Optional)

If you want to be able to collapse the monopod as much as possible for transportation and storage, you may opt for a Velcro strap for the upper mounting position. This will enable you to loosen the strap to further collapse the monopod. Velcro One-Wrap Roll.


Scissors

For cutting zip ties and Velcro straps.


Assembly: Prepare the backpack.

Strap adjustment detail

Your pack is likely to arrive with the buckles centered on the back of the frame. Since we plan to mount our monopod there, this isn’t ideal. Adjust your straps so that the buckles are just off-center, providing the ideal space necessary for the monopod.


Fasten the monopod to the frame.

Align the pack on the center of the frame.

Monopod alignment detail

(Optional) Insert pole between the lower strap and frame for a more secure connection.

Monopod under strap detail

Securely fasten the lower part of the monopod to lower-most portion of the frame.

Lower connection detail

Securely fasten the middle connections using zip ties. Some additional zip ties used as cross-members are helpful for a stable connection. For a cleaner look, you may prefer to place the zip ties such that the “buckle” of the zip tie is hidden on the back side of the frame. The tie buckles are pictured here on the front side for clarity.

Middle connections detail

If you’re using a Velcro strap for the upper connection, you will need a strap approximately 10-12″ in length. Wrap your strap tightly around the pole at least one full time, weave it through the frame then secure it tightly onto itself. If you prefer a stronger connection at the expense of adjustability, feel free to substitute zip ties for the Velcro strap.

Velcro initial wrap detail
Velcro final wrap detail - substitute zip ties here if desired.

Attach the ball mount.

Ball mount attachment detail
Attached ball mount

Our fully assembled pack.

Fully assembled pack

Our rig with shown with an Insta360 Pro II

Fully assembled and field-ready with our Insta360 Pro II

Conclusion

With that, you should have a ready-to-go rig for field data collection.

Looking to make optimal use of your 360º imagery for display in your ArcGIS environment? Site Viewer 360 for ArcGIS and GeoTube for ArcGIS are an easy way to visualize your 360º data within ArcGIS Web AppBuilder and Experience Builder.

LinkedIn
Facebook
Twitter
Email